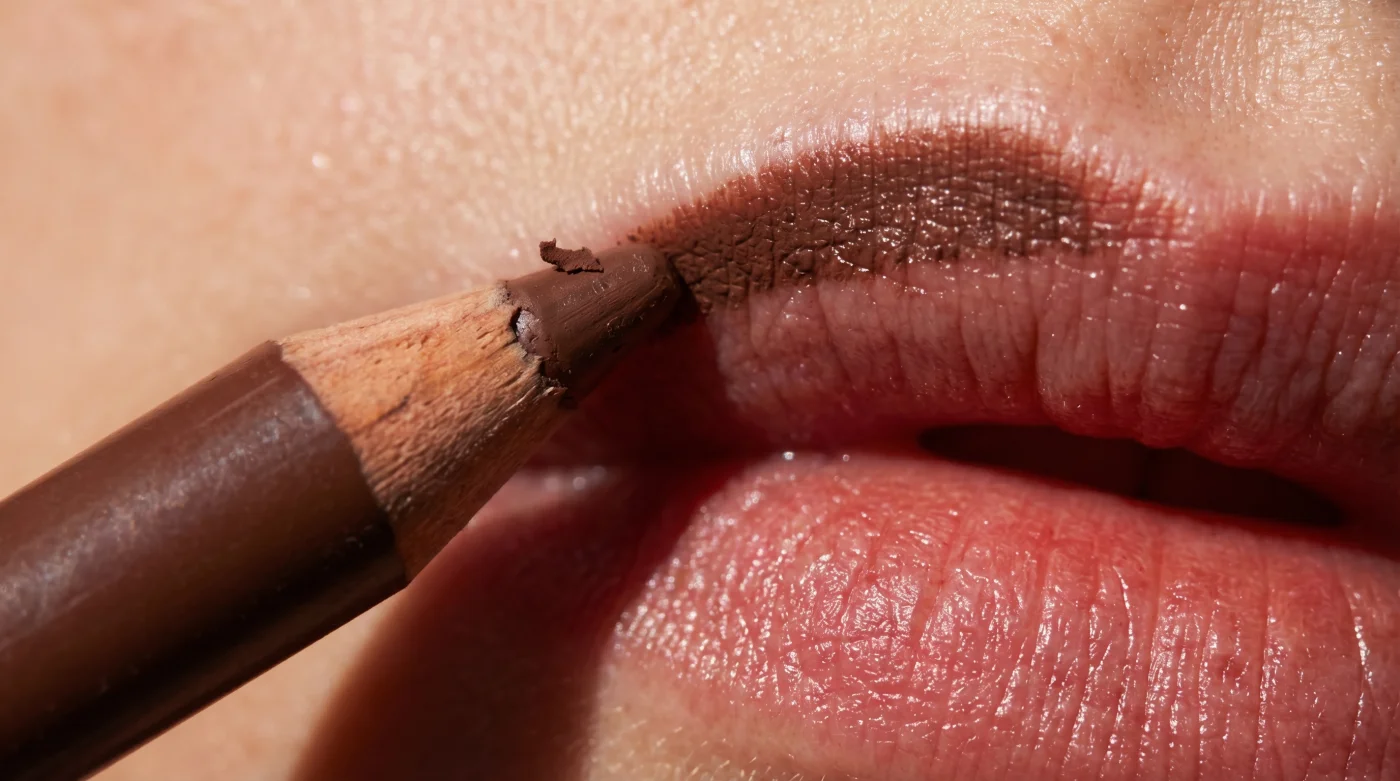
You uncap the pencil. It should feel heavy in your hand. As you press it to your skin, you feel the smooth, waxy glide of the brown pencil following the natural ridge of your mouth. The pigment catches the warmth of your skin, melting just enough to leave a trail of espresso-hued colour against your natural lip border.
Many women avoid this completely. The immediate fear is a harsh, drawn-on nineties aesthetic that looks severe in daylight. We are taught to match our liner exactly to our lipstick, blending everything into a flat, uniform block of colour that ultimately shrinks the mouth. We look at old photographs of unblended rings around the mouth and swear never to repeat the mistake.
But this approach ignores the basic rules of light and shadow. A lip is not a flat shape on a page; it is a three-dimensional curve.
By stepping away from bright pinks and adopting a darker, cooler tone, you can manipulate light and depth to trick the eye. The dark line is not meant to be seen as a boundary. It is meant to mimic the natural shadow cast by a fuller, heavier lip projecting forward.
The Shadow Illusion and Your Internal Glow
The secret to making thin lips look huge is not just about drawing outside the lines. It relies entirely on the texture of your canvas.
A shadow painted over a dry, flaky surface looks exactly like what it is: makeup sitting in cracks. This is where your cellular water retention matters far more than the price tag on your cosmetics. You cannot fake a smooth, receding shadow on dehydrated skin.
True volume starts from the inside out. Your lips lack the oil glands found on the rest of your face, meaning they rely entirely on the water you consume and the moisture you manually trap. Drinking two litres of water a day and maintaining a diet rich in omega fatty acids provides the baseline plumpness required for this trick. When your skin is deeply hydrated from these internal practices, the lip naturally pushes forward slightly, giving the pencil a smooth, taut ridge to glide against.
Let me introduce you to Sarah Macpherson, a 42-year-old session makeup artist working out of London. During hectic backstage prep at Fashion Week, she regularly deals with models whose lips are shrivelled from travel and poor hydration. She relies on a simple five-pound high street brown liner, but she refuses to apply it until the model drinks a full glass of water and sits with a thick layer of medical-grade lanolin on their mouth. Sarah proved that a softly smudged chestnut shadow, layered over deeply hydrated skin, creates more realistic volume than a syringe of clinic filler ever could.
Adjustment Layers for Your Canvas
Not all brown pencils are created equal, and not all lips require the same treatment. Applying a dark liner is highly personal, depending entirely on your natural undertones and the texture of your skin.
For the Fair and Freckled, a warm chocolate brown will look glaringly orange. You need a cool, almost grey-toned taupe to mimic a genuine shadow against pale skin. Think of the colour of an oyster mushroom. This creates a believable hollow just beneath the lower lip line.
- Stop using dry shampoo on dirty hair right now
- Josie Gibson just dyed her hair bright honey blonde
- Charlotte Hawkins just wore this cheap winter coat
- Cosmetic glitter from the Hunter Schafer trend causes permanent corneal scratches.
- Alexa Demie makeup routines are triggering contact dermatitis in teenage skin.
- Castor oil creates an optical illusion without actually stimulating lash growth.
- Dry shampoo application at night completely eliminates morning scalp grease buildup.
- Electrolyte powders fix chronic winter skin flaking faster than heavy creams.
- LED face masks completely fail over thick night cream applications.
- Cream bronzer application requires warm fingertips instead of damp beauty blenders.
If you have an Olive or Warm complexion, those cool greys will look bruised. You require a richer, warmer chestnut or mahogany.
The warmth in the pencil will harmonise with the golden tones in your skin. This allows the edges to fade seamlessly into your natural complexion, creating a rich, softly blurred perimeter that looks entirely natural in direct sunlight.
Then there is the Mature Lip. After forty, we lose collagen, and fine vertical lines begin to appear along the border of the mouth.
A hard, dry pencil will skip over these lines, leaving a jagged, messy edge. Your priority is hydration and slip. Warm the pencil on the back of your hand before application to ensure a fluid, unbroken line, and focus on blurring the pigment inward rather than tracing a sharp, exact perimeter.
The Raw Checklist: Mindful Application
Applying a dark liner for volume is a quiet, deliberate process. It requires a light touch and a clear understanding of where natural shadows fall.
Here is your tactical toolkit for execution. A wooden pencil is preferable to an automatic gel twist-up, as wood-cased wax gives you a crucial thirty-second blending window before the pigment sets permanently into the skin.
Focus on these specific, minimal steps:
- The Temperature: Ensure your pencil is warm. A cold tip drags and skips across the skin, ruining the illusion.
- The Placement: Only draw slightly outside the line on the central third of the upper and lower lip. Keep the corners tightly aligned to your natural shape.
- The Pressure: Barely touch the skin. You are building a whisper of colour, not a thick wall.
- The Blend: Use your ring finger to gently tap and roll the outer edge of the line until it blurs into your surrounding skin.
Notice that the blending is what makes the magic happen. The dark liner makes lips look harsh only if you leave that outer boundary intact.
By softening the outer perimeter with the warmth of your fingertip, you create a gradient of fading pigment. The human eye registers this as a soft, naturally receding shadow, instantly making the lighter centre of the mouth project forward.
Beyond the Pigment
Mastering this small, mundane detail shifts how you present yourself to the room. You are not painting on a fake feature; you are quietly enhancing the architecture you already possess.
It gives you a sense of daily agency. Knowing that a well-placed smudge of brown can instantly balance your proportions provides a quiet, reliable confidence every time you check the mirror.
It proves that you do not need invasive procedures or expensive tools to change your face. You just need an understanding of light, a commitment to your body’s hydration, and a simple wooden pencil.
The difference between a drawn-on lip and a naturally full pout is entirely in the temperature of the wax and the patience of your blending finger. – Sarah Macpherson, Session Makeup Artist
| Key Point | Detail | Added Value for the Reader |
|---|---|---|
| Internal Glow | Drinking two litres of water daily | Plumps the cellular base, allowing the pencil to glide smoothly without catching on dry patches. |
| Tone Selection | Matching the brown to your undertone | Prevents the shadow from looking like dirt or bruising, keeping the illusion realistic. |
| Edge Blending | Tapping the perimeter with a ring finger | Converts a harsh cosmetic line into a believable, volume-boosting optical shadow. |
Frequently Asked Questions
Will a dark brown liner look obvious in daylight? Not if you choose the correct undertone and soften the outer edge until it disappears into your skin.
Do I need a lip brush to blend the edges? A clean ring finger is actually better. The body heat from your skin melts the wax perfectly for a seamless fade.
Why is my liner skipping and looking patchy? Your pencil is likely too cold, or your lips are dehydrated. Drink a glass of water and warm the pencil tip on the back of your hand.
Can I use a liquid lipstick over this shadow? It is better to use a sheer gloss or a hydrating balm. Heavy liquid lipsticks will cover the shadow effect entirely.
Does this technique work on asymmetrical lips? Yes. You can apply slightly more shadow on the thinner side to visually balance the volume without it looking painted on.